Monday 23 July 2018

How to Install Java in macOS

The best approach to install Java on the Mac is to get the latest version of Java JRE directly from Oracle. This is fairly straight forward and you can either initiate the process from the terminal application in macOS or by going directly to the Java download page on Oracles website.
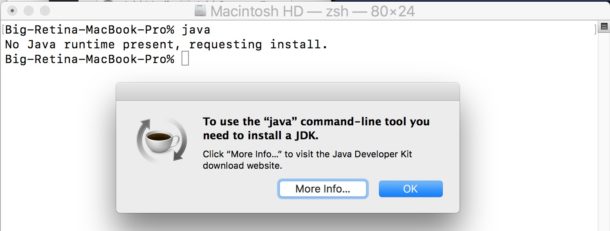
Open the Terminal app and type the following:
java
Click on the “More Info” button to jump to the Java downloads page in a web browser
Start installing Java on MacOS
Start installing Java on MacOSThis will allow you to download and install the newest most recent version of Java available for the Mac, which is currently JRE8.

Remove Oracle Java cache on Mac

Below are the steps to clear Java cache from any Mac machine:

  1. Click on the Finder icon located in your dock
  2. Click on Go in the Finder menu
  3. Click on Utilities
  4. Double-click on the Terminal icon
  5. In the Terminal window Copy and Paste the commands below:
    rm -r ~/"Library/Application Support/Oracle/Java"

Uninstall Oracle Java using the terminal from any Mac machine

Note: To uninstall Java, you must have Administrator privileges and execute the remove command either as root or by using the sudo tool.

Remove one directory and one file (a symlink), as follows:
  1. Click on the Finder icon located in your dock
  2. Click on Go in the Finder menu
  3. Click on Utilities
  4. Double-click on the Terminal icon
  5. In the Terminal window Copy and Paste the commands below:
    sudo rm -fr /Library/Internet\ Plug-Ins/JavaAppletPlugin.plugin
    sudo rm -fr /Library/PreferencePanes/JavaControlPanel.prefPane
    sudo rm -fr ~/Library/Application\ Support/Oracle/Java
Do not attempt to uninstall Java by removing the Java tools from /usr/bin. This directory is part of the system software and any changes will be reset by Apple the next time you perform an update of the OS.